
What “product dimensions” means for packaging
In a packaging RFQ, product dimensions describe the finished item you will pack, not the empty dieline or a shelf listing alone.
| Record | Meaning for the factory | Common trap |
|---|---|---|
| Maximum outer envelope | Largest length × width × height the packed item occupies | Using only nominal catalogue size |
| Orientation | Which face is base, front and top in the pack | Rotating the product between quotes |
| Weight | Packed unit weight for insert and board discussion | Omitting pumps, caps or kits |
| Protrusions | Caps, pumps, clips, hang tabs, seams, labels | Measuring the body and ignoring the tallest point |
| Accessories in the same pack | Cards, scoops, sachets, spare lids | Quoting the hero SKU only |
If several SKUs share one outer pack, measure every finished unit and size to the largest envelope, or treat each size as its own design.
Tools and units before you measure
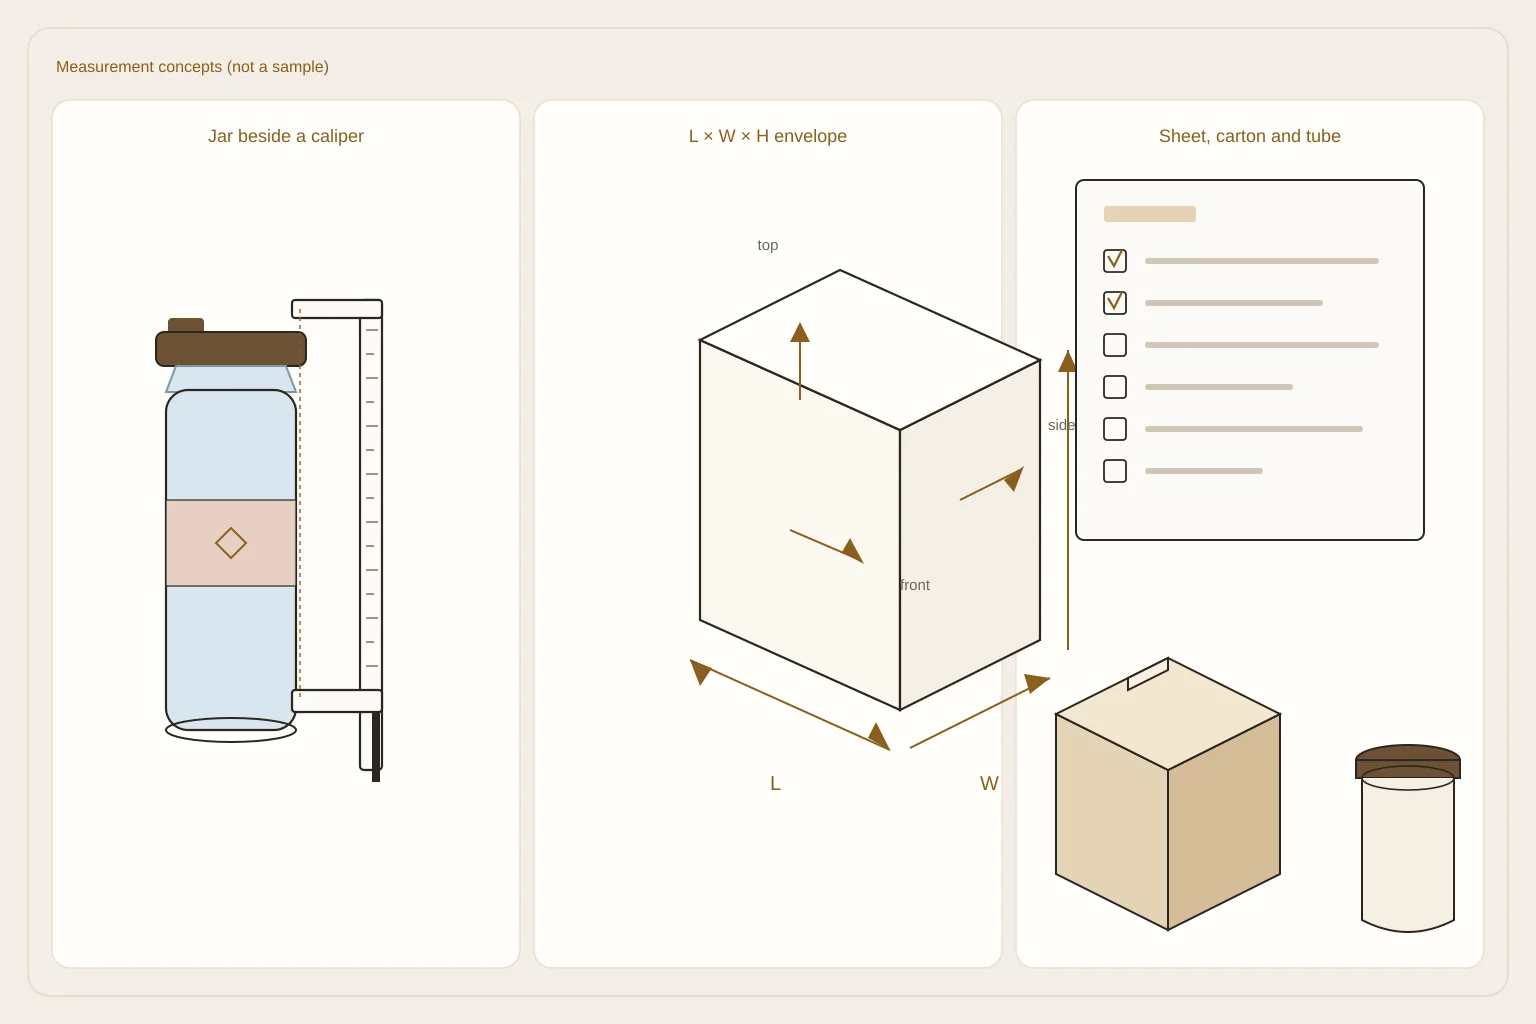
- Use a caliper for bottles, jars and small cartons; a steel rule or tape is fine for larger packs when you state the resolution.
- Pick one unit system (mm preferred; inches only if every party uses inches) for the whole brief.
- Write measured vs nominal: “jar OD 51.2 mm measured on labelled unit” is not “50 mm catalogue”.
- A photo next to the rule helps shape context; it does not replace a written dimension.
- Measure the final labelled, capped configuration you will ship — shrink bands and hangers change the envelope.
Step-by-step: length, width and height
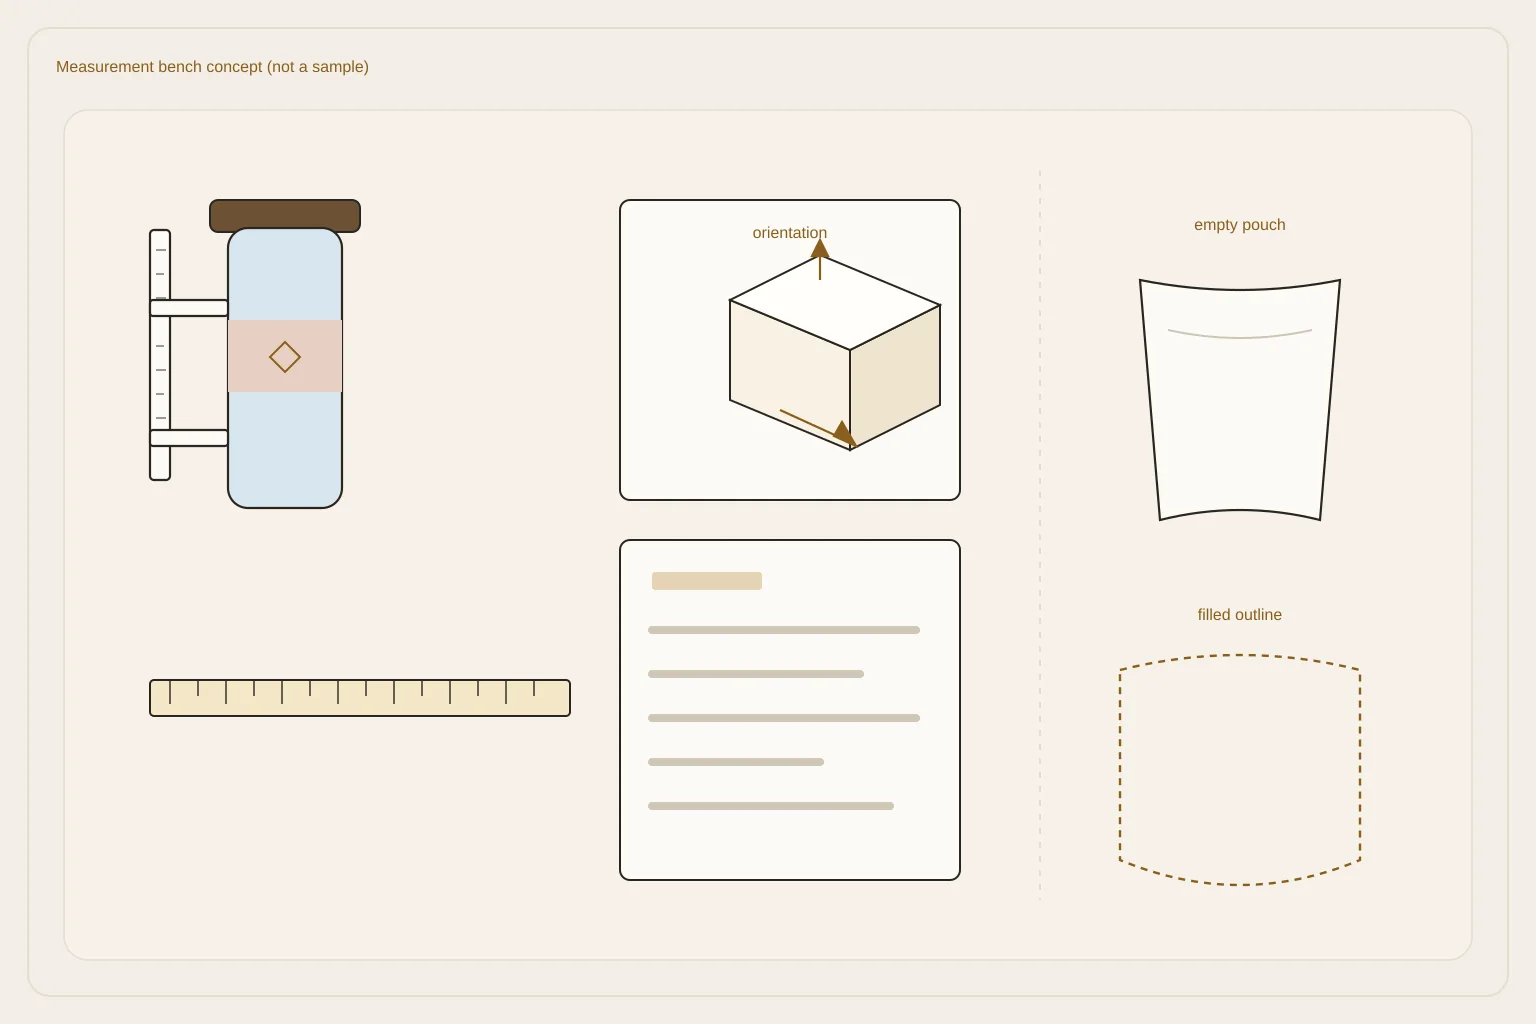
- Place the product in the orientation it will sit in the pack and state that orientation.
- Measure length as the longest base side (or agreed X axis).
- Measure width as the shorter base side (or Y). For round items, record outer diameter instead of L×W.
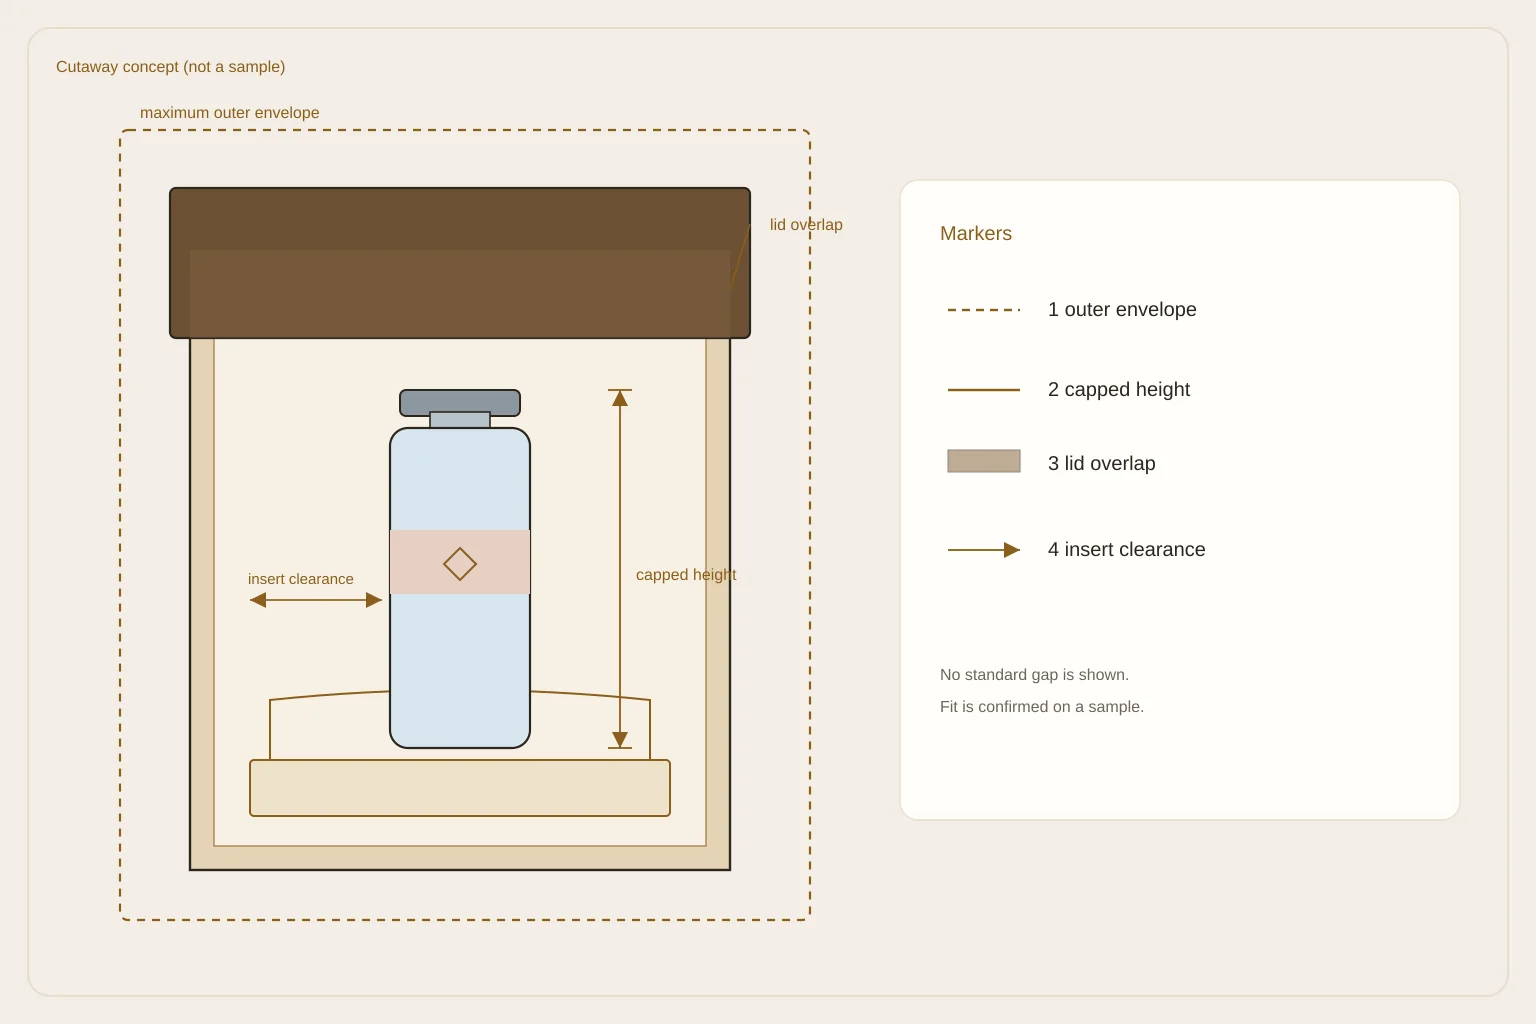
- Measure height to the highest point that must clear the lid, sleeve or tube top, including the closed cap or pump in shipping position.
- Re-measure after adding any accessory in the same cavity.
- Record raw readings first; if you round for the brief, state the rule (for example nearest 0.5 mm).
For irregular shapes, record the maximum envelope and where high points sit. Do not average a taper into a “typical” size without saying so.
Caps, pumps, labels and kits
Sampling fails when the body fits but the closure does not.
- Measure capped / closed height separately from body-only height.
- If a pump is taller or wider than the body, record both body and pump OD/height.
- Note label stack-up and whether labels go on before or after loading the outer pack.
- For kits, list every part, load order and stacked height.
- Soft primary packs need the filled, sealed size, not the flat empty size.
Clearances for inserts, lids and windows
Factories cannot invent a safe gap from a marketing render. In the RFQ:
- Ask for internal finished size when the product sits inside a carton, rigid box, tube or tray.
- Ask how much height a lid overlap or telescoping closure consumes so net / usable height is clear.
- Describe insert function first (stop rattle, locate a jar, separate kit parts), then geometry.
- For window cartons, note the visible face and anything that must not touch the film.
- Leave friction and transit performance to sampling — do not claim a clearance always works.
Folding-carton size, board and print fields: folding carton RFQ specification. Structure options: paper packaging category.
Measurement sheet you can paste into an RFQ
| Field | Your entry | Notes |
|---|---|---|
| SKU / version | Match artwork version | |
| Orientation sketch | Base / front / top labelled | |
| L × W × H or OD × H | Unit + measured/nominal | |
| Weight | Packed unit | |
| Cap / pump | OD and height if different from body | |
| Label / band | Applied before pack? | |
| Kit parts | Load order | |
| Insert function | Or “none” | |
| Target outer pack type | Folding / rigid / tube / clear / mailer — keeps quotes comparable | |
| Quantity per design | See MOQ below | |
| Destination markets | On-pack text space |
Copy the completed sheet into your quote brief or calculator notes so every supplier sees the same numbers.
MOQ, sampling and lead time
Per MUGE commercial defaults (always subject to the formal quote):
- MOQ 500 pieces per design. New artwork or a new size is a new design; designs cannot be combined to meet MOQ.
- Sampling typically 3–7 working days, subject to quote confirmation.
- Bulk typically 12–25 working days, subject to quote confirmation.
- Die-cut / plate cost is included in the unit price.
No fixed unit prices, discounts or payment terms are published here.
Common mistakes
- Sending only a hero photo and asking for “a snug fit”.
- Mixing catalogue millimetres with measured inches in one table.
- Measuring the empty bottle and packing the labelled, capped bottle.
- Ignoring lid overlap so net height is short on the first sample.
- Combining two sizes into one MOQ line when each size is a separate design.
- Treating a redirected “box size finder” URL as a measurement record — that old path now points at the quote calculator and does not store your dimensions.
After you measure
- Paste the sheet into the quote brief template.
- Or enter quantity and structure notes in the quote calculator and attach the same dimensions in your message.
- Request a sample review before bulk; fit is confirmed on the physical pack, not on the spreadsheet alone.
- Questions about a live project: contact.
Frequently asked questions
- Do I need exact millimetres before the first quote?
- Send the best measured envelope you have and mark open items. Preliminary reviews can start with clear unknowns; bulk and plates should wait until critical dimensions are stable.
- Can one outer size cover several product heights?
- Only if every finished unit fits the same internal envelope and insert plan. Otherwise each size is its own design for MOQ and tooling.
Send your measured product dimensions
Send your measured product dimensions, pack type and quantity for a project review via the quote calculator or contact. Include orientation, capped height and insert function so the first sample targets the right fit.