
Spirits packaging · RFQ guide
How to Specify a Wine Bottle Rigid Box Before Requesting Quotes
A useful quote starts with the actual bottle, insert contact map, presentation structure, shipping configuration and approval record—not a box photo and a nominal bottle volume.
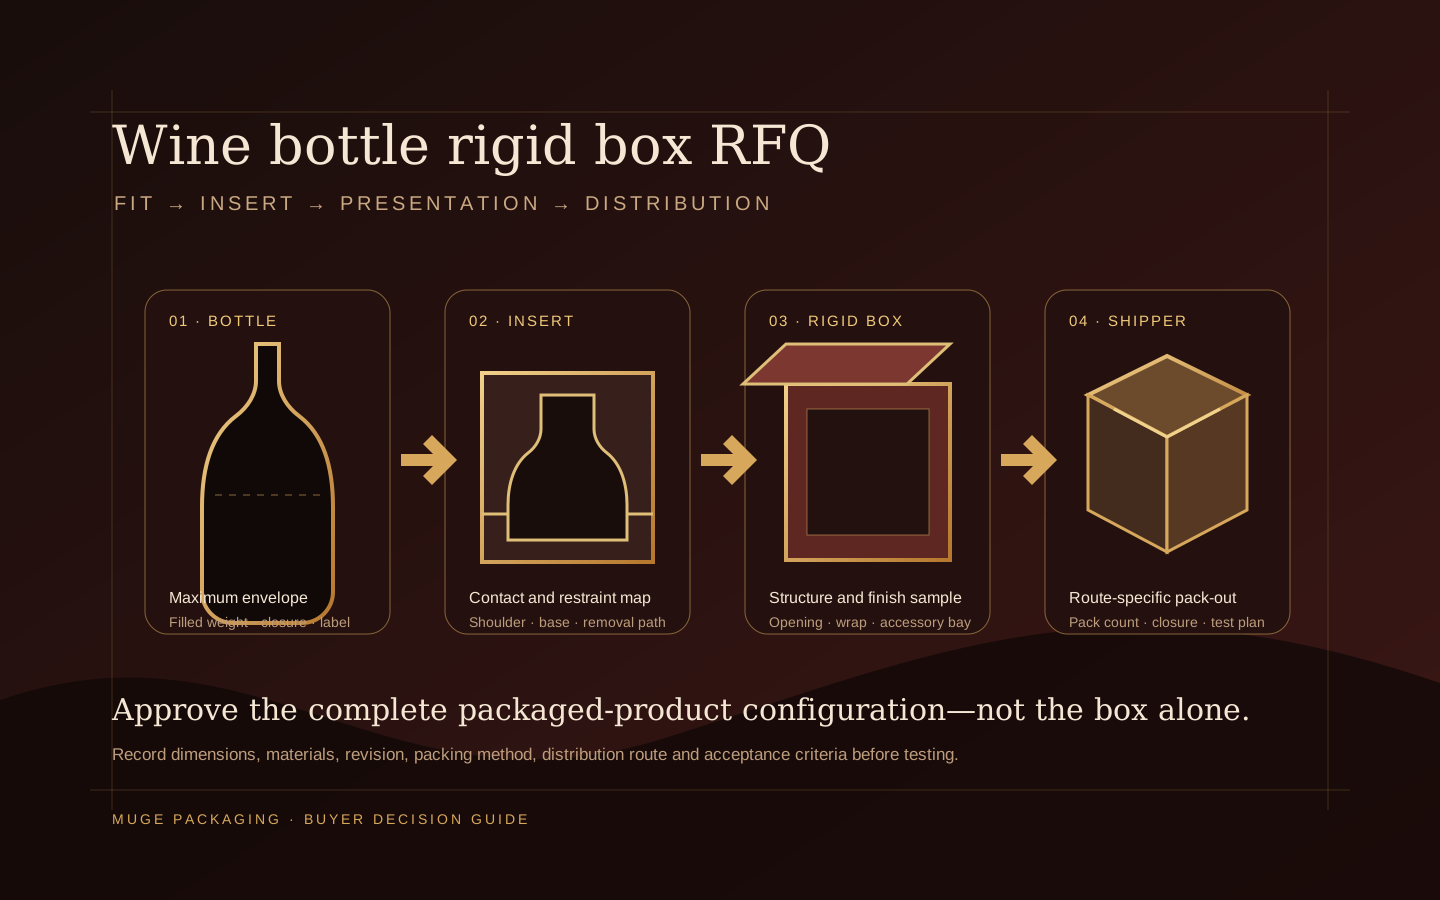
Editorial specification diagram. It is not a customer project photo, production drawing or test result.
The direct answer
Send one controlled RFQ pack containing the retail-ready bottle measurements and weight, accessory layout, box opening style, insert contact restrictions, artwork and finish direction, quantity, destination market, packing method and distribution route. Then ask suppliers to state their assumptions and sample plan against that same revision.
The result should be a comparable structural proposal—not several prices based on different bottles, inserts or shipping assumptions.
Step 1 · Control the product reference
Build a bottle sheet from the packed SKU
“Standard wine bottle” is not a design dimension. Bottle shoulders, bases, closures, labels and decorative features vary. Measure the exact retail-ready configuration that the insert will hold.
| RFQ field | What to record | Why it changes the package |
|---|---|---|
| Finished bottle envelope | Maximum height, body diameter or L × W, base and shoulder profile | Nominal volume does not define the outer geometry used to design an insert. |
| Closure and decoration | Cork, cap, capsule, neck sleeve, label, embossing and fragile surface zones | A closure or raised decoration can become the highest or widest contact point. |
| Filled weight | Retail-ready bottle weight and center-of-mass concern, not empty glass alone | Insert support and pack-out decisions must reflect the shipped configuration. |
| Orientation | Upright, horizontal or angled presentation plus loading and removal direction | The insert must support both presentation and the intended handling sequence. |
| Accessories | Glassware, pourer, booklet, card or secondary bottle dimensions and weight | Accessory movement can create bottle contact, noise or an obstructed opening path. |
| Revision control | Bottle drawing or physical sample ID, date, artwork revision and approver | A correct sample built around an obsolete bottle is still the wrong package. |
Step 2 · Choose the opening experience
Compare structures against the same bottle and use case
Structure follows bottle access, set composition, presentation and packing—not “luxury” as an abstract style. Review these directions with the broader custom wine bottle rigid presentation box and the rigid and folding gift box range.
Two-piece lid and base
Clear vertical presentation and a familiar premium opening sequence.
Review: Lid depth, release feel, lift points, bottle access and insert visibility.
Book-style magnetic box
Useful when the inner lid carries a story panel or the set opens laterally.
Review: Hinge direction, magnet closure, lid load, finger access and ship-flat constraints.
Drawer rigid case
Supports a controlled reveal and can separate the presentation sleeve from the tray.
Review: Tray clearance, pull strength, bottle orientation, stop method and accessory movement.
Foldable rigid structure
Can reduce empty storage volume when the final assembly remains repeatable.
Review: Assembly sequence, corner alignment, closure, insert installation and packing labor.
Step 3 · Design contact before decoration
Write an insert contact and removal map
An insert is not selected by appearance alone. It positions the bottle, controls movement, protects sensitive surfaces and guides removal. Material choice comes after these jobs are clear.
Ask the supplier to tie any proposed tolerance, foam density, board thickness or test-pass statement to the exact project drawing, material record and test evidence.
Where may the insert touch?
Mark the base, body, shoulder and neck contact zones. Also mark labels, metallic decoration, coatings or raised details that must remain untouched.
What load should each support carry?
Separate visual centering from structural support. A soft lining can protect appearance, but it does not by itself define the load path or transport performance.
How is the bottle removed?
Define finger access, pull tab, ribbon or lift direction. The buyer should not need to pull the neck, scrape the label or invert a heavy bottle to remove it.
What else moves inside the set?
Give every glass, pourer, booklet and card a location. Review whether accessories can leave their cavities and contact the bottle during handling.
Material decision
Separate structure, touch surface and finish
A rigid box commonly combines a structural board, wrap, insert and optional lining. Each layer needs its own job and approval criterion. Review the structural core in the rigid greyboard reference, then compare paperboard, corrugated, moulded-fibre or foam insert directions by project.
- Structural board: box stiffness, lid or drawer behavior, panel flatness and assembly route.
- Wrap and print: color, seam position, foil or embossing, rub risk and visible corner finish.
- Insert body: bottle support, restraint, accessory separation, loading and removal.
- Touch surface: contact with labels or decoration, fibre or coating transfer and cleaning expectations.
Step 4 · Define the transported unit
The gift box and the shipping pack are not automatically the same
State whether the item moves as an individual parcel, inside a case pack, on a pallet or through a retailer distribution system. Record the presentation box, corrugated shipper, spacing, closure, orientation, pack count and pallet pattern that will actually be evaluated.
Presentation layer
Rigid box, insert, bottle and accessories approved for fit, finish and opening behavior.
Shipping layer
Corrugated shipper, void control, closure, marks and pack count defined for the route.
Acceptance layer
Bottle condition, leakage or breakage, label damage, insert movement, closure and visible box condition defined before testing.
Step 5 · Plan evidence before naming a test
Use the distribution route and acceptance criteria to select a procedure
ISTA distinguishes early screening procedures from general-simulation procedures. Its guidance also emphasizes understanding the actual distribution environment and documenting the product, package, options, calculations, deviations and pre-agreed damage criteria.
The ASTM catalog identifies packaging and distribution test methods. ISO 4180 addresses performance-test schedules for complete, filled transport packages and excludes dangerous-goods packages from its scope. A qualified laboratory or responsible test owner should select the applicable current method, level and configuration.
A citation, informal drop, prototype photo or ISO 9001 certificate is not a transport-test result.
Test item
Exact bottle, insert, rigid box, shipper and pack count
Route
Parcel, case-pack, pallet, climate and handling assumptions
Criteria
Unacceptable bottle, label, insert, closure and box conditions
Record
Procedure/version, level, samples, deviations, observations and result
Step 6 · Bind approvals to one revision
Use four sample stages instead of one vague “approved sample”
01 · Bottle and layout proof
Output: Current physical bottle or controlled 3D data, accessory list and marked presentation orientation.
Approve: Correct SKU, maximum envelope, loading sequence and contact restrictions.
02 · Unprinted structural sample
Output: Box and insert geometry without relying on final decoration to hide fit issues.
Approve: Fit, retention, opening, removal, lid or drawer behavior and basic pack-out.
03 · Finish and artwork sample
Output: Production-intent wrap, print, foil, embossing, lining and artwork placement direction.
Approve: Color reference, registration, seams, corners, rub risk and visible surface quality.
04 · Packed-system review
Output: Presentation box, accessories, corrugated shipper, closure, pack count and void control together.
Approve: Named acceptance criteria and the agreed screening or laboratory test plan.
For an example of documenting only what physical photos can actually prove, see the two-piece rigid box lid-fit reference. It deliberately does not invent dimensions, board grade or transport results from photographs.
Failure prevention
Six common specification failures—and the corrective action
Quoting from a 750 mL description instead of the bottle
Corrective action: Use the maximum retail-ready bottle envelope and filled weight. Volume alone cannot define bottle geometry.
Supporting the neck while the base can move
Corrective action: Map support and restraint around the whole bottle. Avoid concentrating load on a closure or decorative feature unless the design has been reviewed for it.
A premium lining rubs the label
Corrective action: Treat touch points, fibre direction, adhesive edges and removal friction as approval items, not just visual choices.
Accessories share an open cavity
Corrective action: Separate heavy or hard items so they cannot migrate into the glass bottle or block the opening sequence.
The rigid box is approved without its shipper
Corrective action: Review the complete pack-out that will be transported. Presentation quality and distribution protection are different decisions.
A test name is listed without a pass criterion
Corrective action: Before testing, define the exact configuration, procedure, level, unacceptable bottle or package conditions and required evidence record.
Copy this RFQ checklist
Attach drawings, photos and revisions separately. Mark unknown fields as “supplier to propose,” not as assumed facts.
Primary and authoritative references
These sources establish test-planning and market-requirement boundaries. They do not prove that a particular MUGE package passed a procedure or complies with a destination market.
- ISTA test procedures
Official distinction between screening, partial-simulation, general-simulation and development procedures for packaged products.
- ISTA guidance for selecting and using procedures
Test selection should reflect the actual distribution environment, with the packaged product, criteria, options and deviations documented.
- ASTM packaging standards catalog
Official catalog for packaging and distribution methods; the responsible test owner must select the applicable current method. This catalog is not a test report.
- ISO 4180:2019
Official reference for planning performance-test schedules for complete, filled transport packages; dangerous-goods packages are outside its scope.
- TTB: US domestic wine labeling (7% ABV or more)
US domestic-wine example for products at 7% ABV or more. It does not establish requirements for every destination or spirits product; the buyer must confirm applicable requirements.
Wine bottle rigid box RFQ questions
What bottle measurements should be included in a rigid box RFQ?
Record the maximum finished height, body diameter or width and depth, base geometry, shoulder profile, neck and closure envelope, filled weight and intended orientation. Measure the exact retail-ready bottle with its closure, label, sleeve and any decoration installed.
Which insert is best for a wine or spirits bottle gift box?
There is no universal best insert. The decision depends on bottle weight and geometry, surfaces that may be touched, presentation goals, removal direction, accessory layout, distribution route and the buyer's material requirements. Paperboard, corrugated, molded-fibre or foam directions should be compared against the same product and acceptance criteria.
Can the rigid presentation box be used as the shipping box?
Do not assume so. A presentation box may still need a corrugated shipper, spacing, closure and pack-out plan. The required transport configuration depends on parcel, case-pack, pallet or retail distribution and should be evaluated as the complete packaged-product system.
Does citing ISTA or ASTM mean a wine box has passed testing?
No. A citation identifies a possible planning framework. A pass claim requires the exact packaged-product configuration, current procedure, test level, acceptance criteria, laboratory record and result. Changing the bottle, insert, closure, shipper or pack count may require review or retesting.
What should be approved before rigid box production?
Approve one controlled package revision covering bottle and accessory fit, box dimensions, insert construction, material and finish direction, artwork, opening and removal behavior, packing method, acceptable defects and any agreed transport-test record.
Project review
Send the bottle sheet before asking for a final quote
Share bottle dimensions and weight, accessory layout, structure direction, quantity, artwork status, destination market and distribution route. MUGE PACKAGING can then review the box, insert, sample and pack-out questions that still need confirmation.
Start with the spirits and wine packaging route or send a quote-ready brief.